Image Generator Python client
For a quick glance at features for the Image Generation Client, please see the Image Generator reference.
The ImageGenerator class specializes in supporting image generation in your application, and guiding what options are available to modify your outputs. It will return a list of all images using the Image type. It allows you to use both Stable Diffusion 1.5 and Stable Diffusion XL for text to image and image to image use cases, and set parameters and prompts either with weighted prompts with the prompt field as was common with Stable Diffusion 1.5 or human-readable descriptions using prompt_2 with Stable Diffusion XL 1.0.
This guide will walk you through a text to image example, and then we will use the resulting image to demonstrate the image to image use case.
Requirements
- First, create an OctoAI API token.
- Then, complete Python SDK Installation & Setup..
- If you use the
OCTOAI_TOKENenvvar for your token, you can instantiate the image_gen client withclient = ImageGenerator()
- If you use the
Simple Text to Image Generation Example
from octoai.clients.image_gen import ImageGenerator

if __name__ == "__main__":
  	# If OCTOAI_TOKEN is not set as an envvar, you can also pass a token to the client with:
    # ImageGenerator(token="YOUR_TOKEN_HERE")
    client = ImageGenerator()
    # images is a list of Images from octoai.types
    image_resp = client.generate(engine="sdxl", prompt="photorealistic, poodle, intricately detailed")
    images = image_resp.images

    # images can be filtered for safety, so since we only generated 1 image by default, this verifies
    # we actually have an image to show.
    if image_resp.removed_for_safety == 0:
      images[0].to_pil().show()
After running this simple prompt, you should hopefully have an output somewhat similar to the image below:
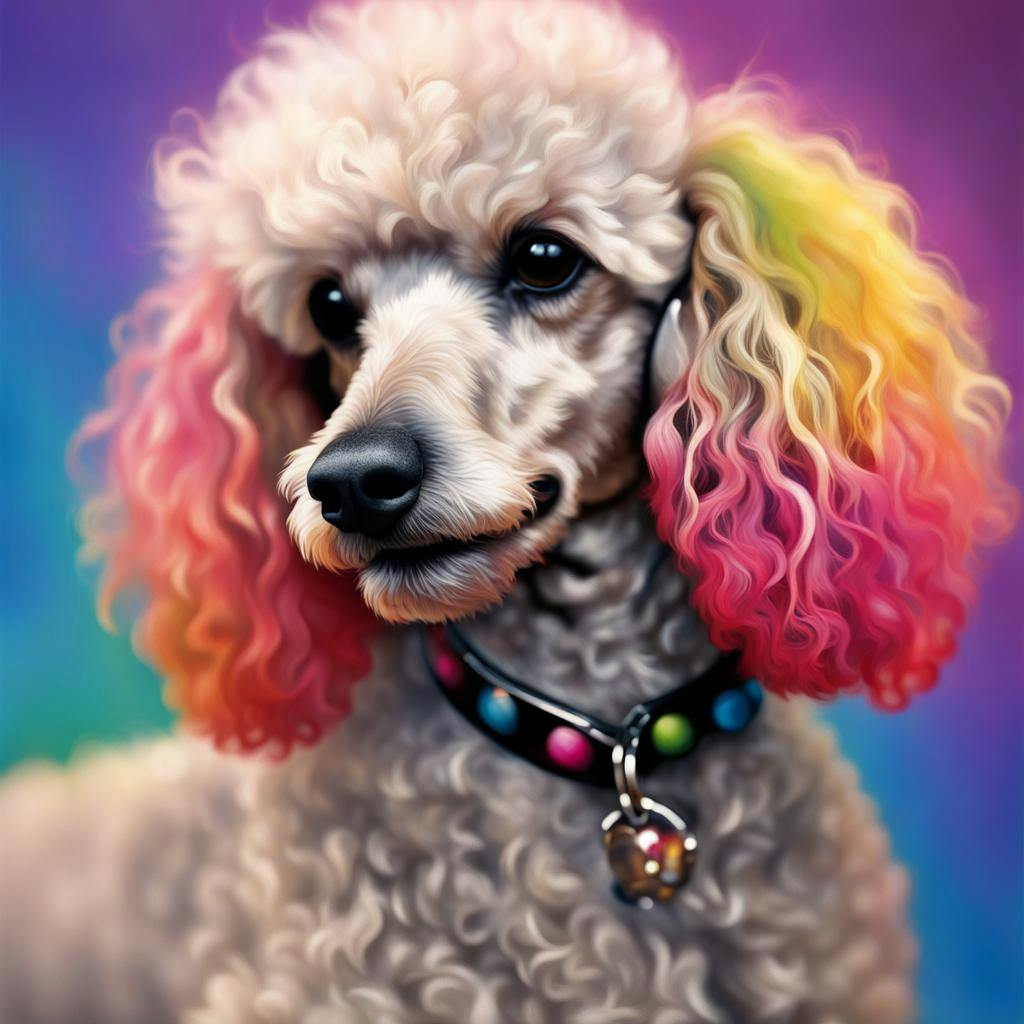
A good start and in our next example, we’ll use more features to help guide our outputs.
Text to Image Generation Example
For a full list of features available, please see the ImageGenerator.generate() reference. One of the simplest ways to customize your outputs is a style preset, negative_prompt, loras, and model selection.
from octoai.clients.image_gen import ImageGenerator

if __name__ == "__main__":
    prompt = "photorealistic, colorful, poodle, intricately detailed"
    file_name = "pretty_poodle_cinematic.jpeg"

    client = ImageGenerator()
    images_resp = client.generate(engine="sdxl",
        prompt=prompt,
        negative_prompt="horror, scary, low-quality, extra limbs, cartoon",
        checkpoint="crystal-clear",
        style_preset="cinematic",
        loras={"add-detail": 1.0},
        steps=50,
    )
    images = images_resp.images
    # It can also be helpful to run another generate method with
    # num_images = image_resp.removed_for_safety to get your desired total images
   	if images_resp.removed_for_safety == 0:
    	images[0].to_file(file_name)
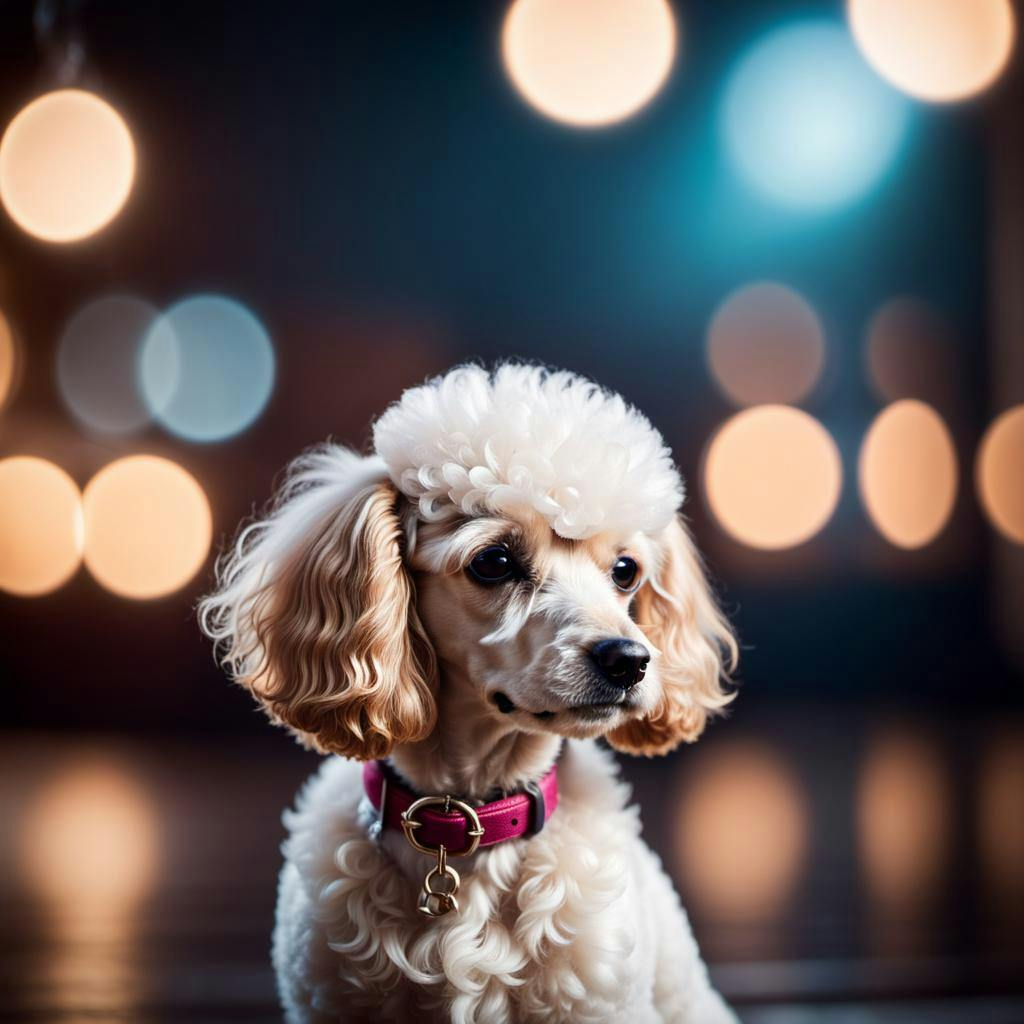
Much more realistic! Now that we have our cinematic poodle, let’s go ahead and use this image as part of an image-to-image workflow.
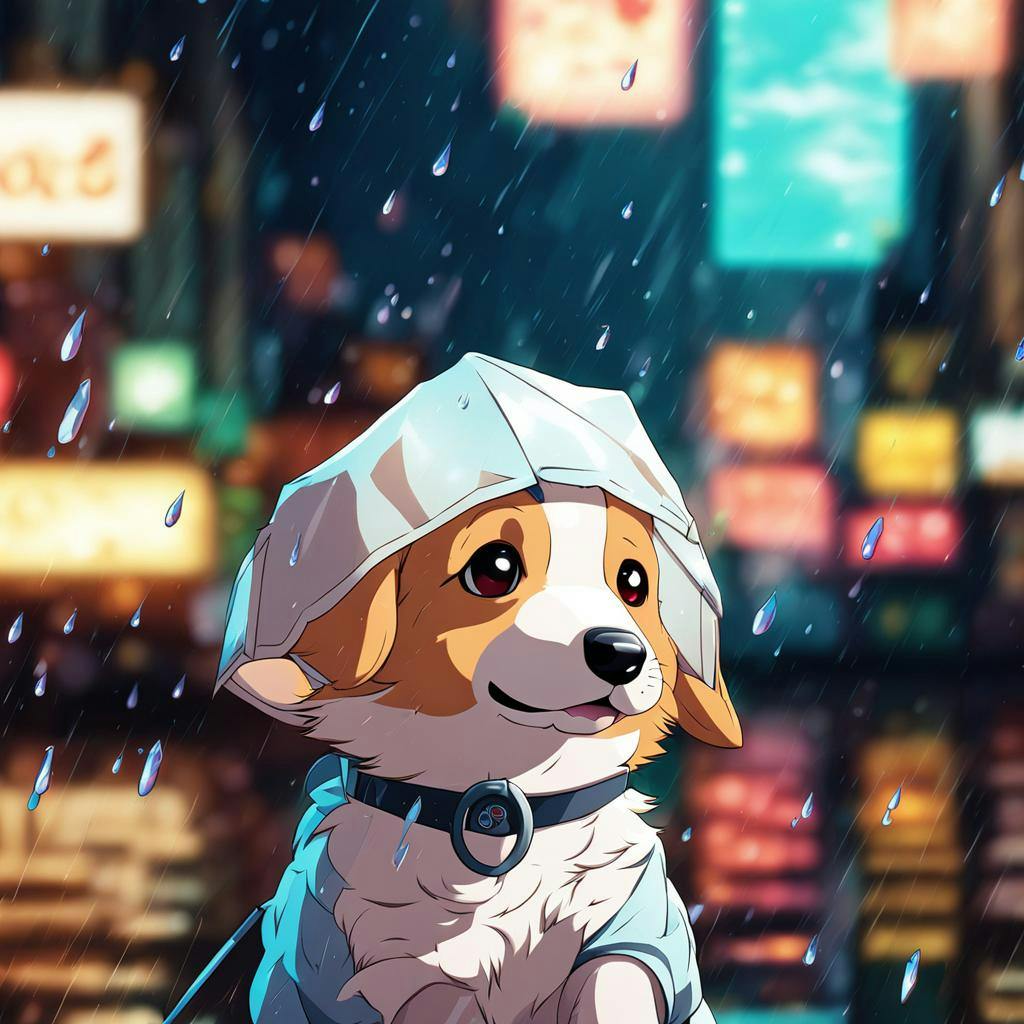
Image to Image Generation Example
Image to Image Generation lets you use a base image, in our case the above pretty_poodle.jpeg to shape the feel of your outputs image. In our case, we’d expect some focal point in the center, and a blurred, bright background, but otherwise our output can look anywhere from completely different or quite similar depending on our prompt. In this case, let’s go for a complete different style of outputs and stray from the usual theme of poodles to a corgi in the rain.
from octoai.clients.image_gen import ImageGenerator
from octoai.types import Image

if __name__ == "__main__":
    client = ImageGenerator()
    init = Image.from_file("pretty_poodle_cinematic.jpeg")
    images_resp = client.generate(
      engine="sdxl",
      prompt="corgi in the rain",
      init_image=init,  # Only used for image-to-image
      strength=0.8,  # Only used for image-to-image
      style_preset="anime"
    )
    images = images_resp.images
    images[0].to_file("rain_corgi.jpeg")